

How To Draw Shadow On Face
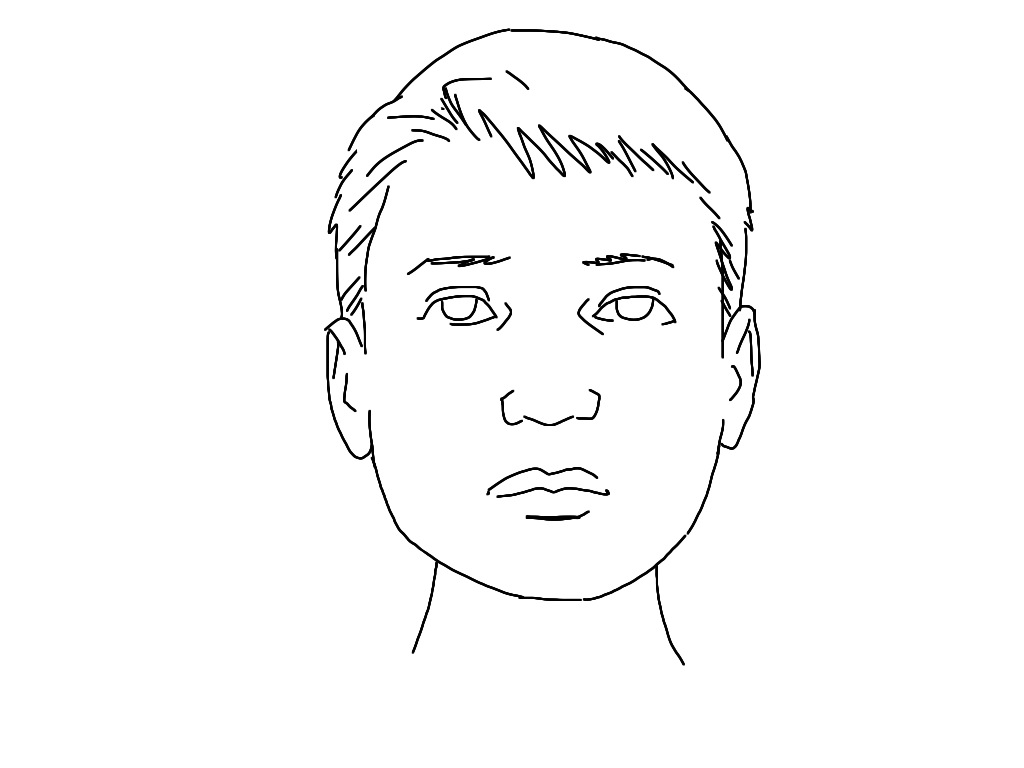 Bland. That's how I would describe this face. I obvouiusly drew it like that on purpose to make a point. But without really changing the expression of the character, I can easily make it more interesting to look at, by adding some dramatic shadows.
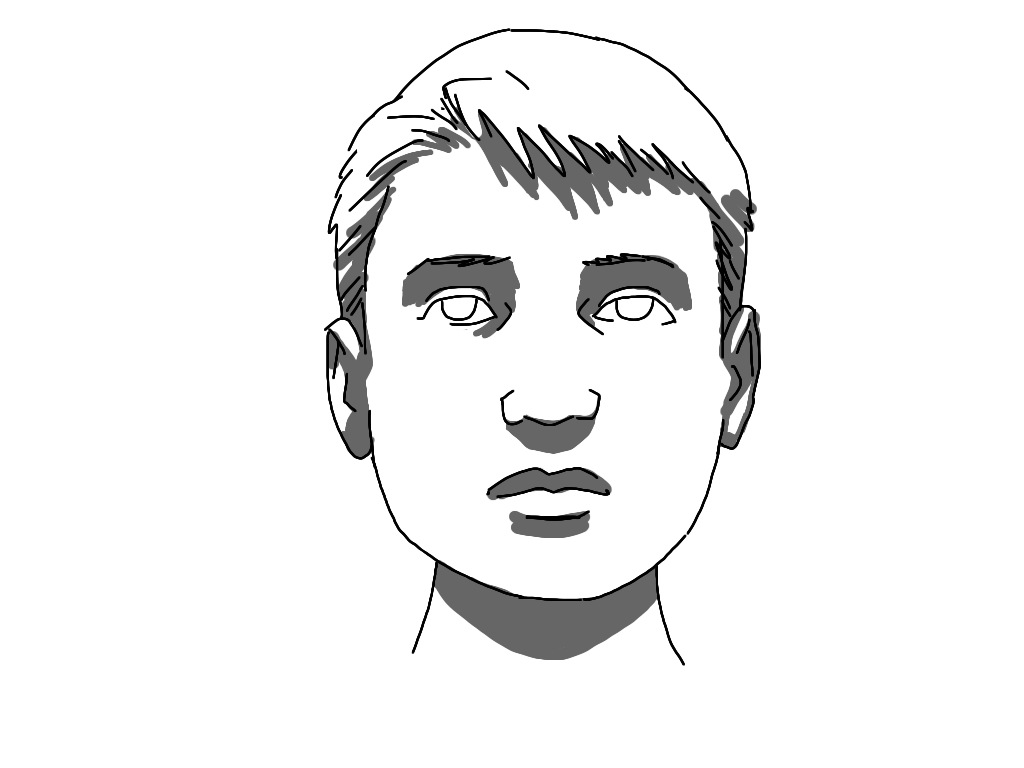 1: Downlit
The safest way to apply shadow, is under all the features of the face that extrude – The chin, the nose, the eyebrows (and in this case, the hair).
Effect: If applied lightly, like shown here, not much. But it DOES make the drawing quicker to read, as the main features stand out.
Pitfalls: Shading under eyes and chinbones can make characters look very old/bony.
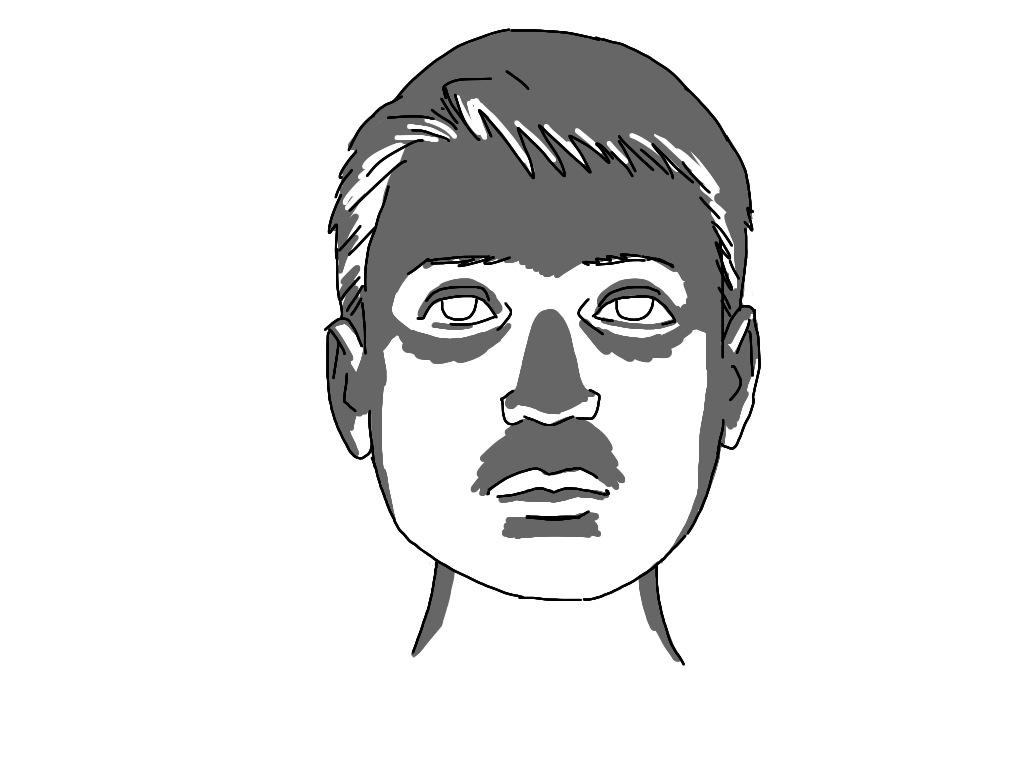 2: Uplit
Oooh, spooky! Who hasn't held a flashlight under their chin to look like this?
Effect: Dramatic, fearful, scary.
Pitfalls: That shadow on the upper lip could easily look like a moustache. Handle with care.
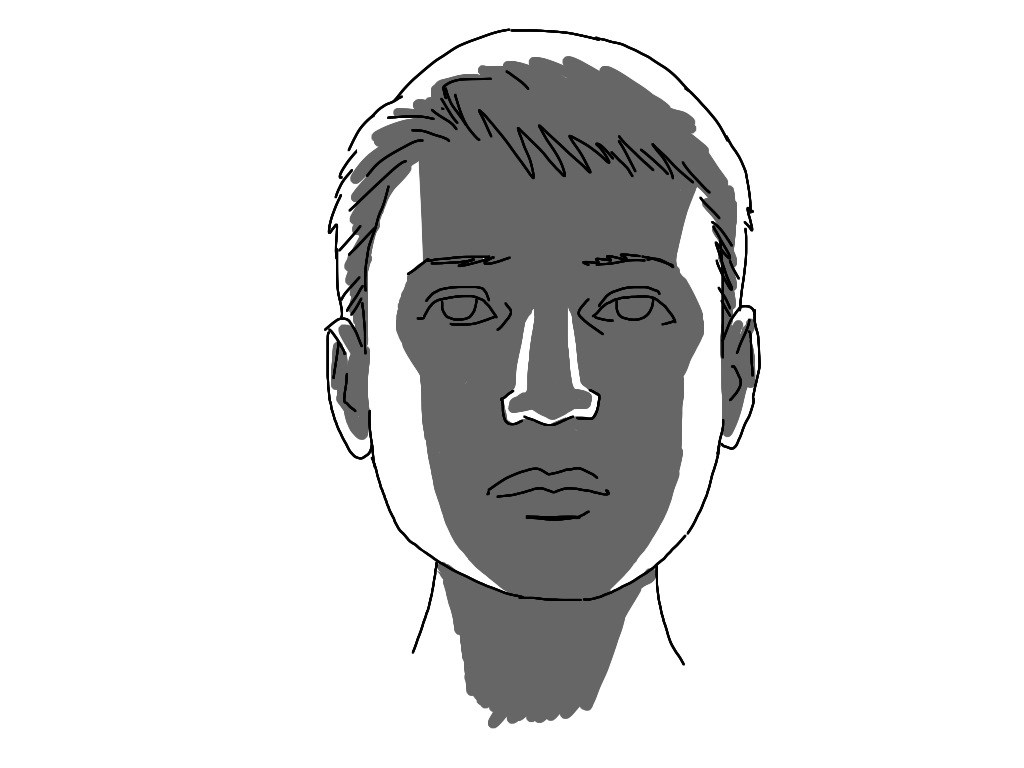 3: Backlit
Another great dramatic shading technique, allowing you to hide facial details = less to draw!
Effect: Makes the character look menacing and/or makes the reader uneasy, because the expression is unreadable.
Pitfalls: Too much black, and you can't recognize the character. Too little, and it will look like a smear right down the middle of the face.
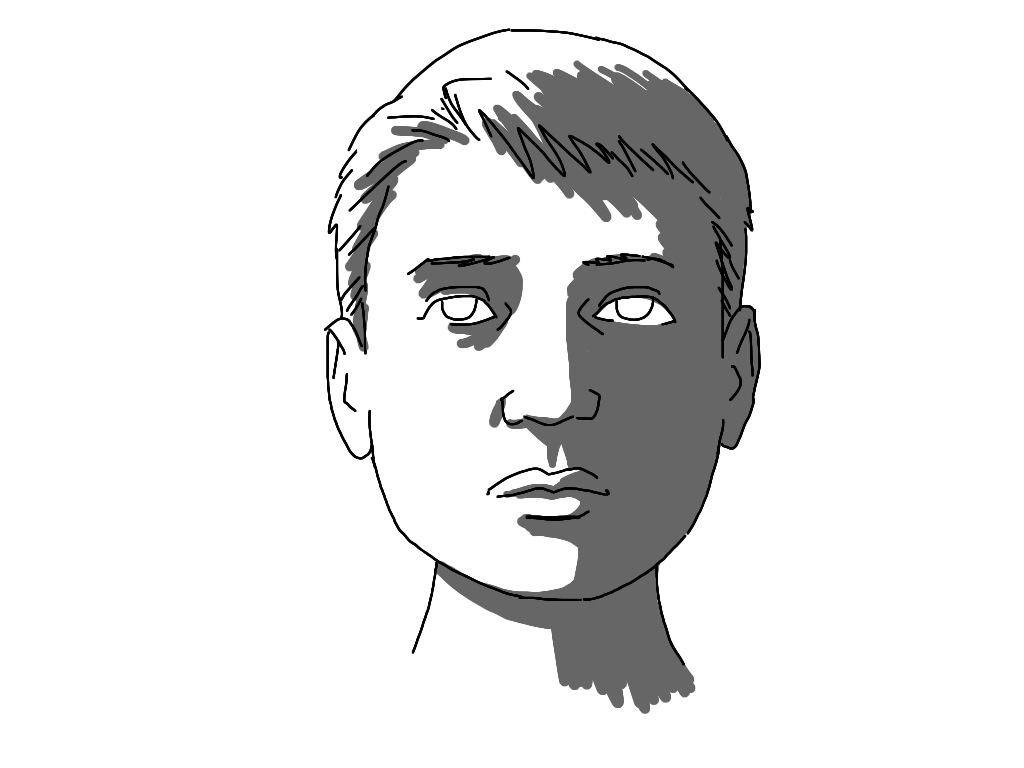 4: Sidelit
One of the most used ways of shading is the light from one side. It also helps reader navigation, like if you cut between two characters talking – one would be lit from the left, the other from the right.
Effect: I guess you could go Freudian, and imply split personality, but… In reality, it just looks cool.
Pitfalls: Too sharp lines between the light and dark side will make it look like the person put on half a cowl. Put some dark areas on the light side of the face and blend the lines: Problem solved.
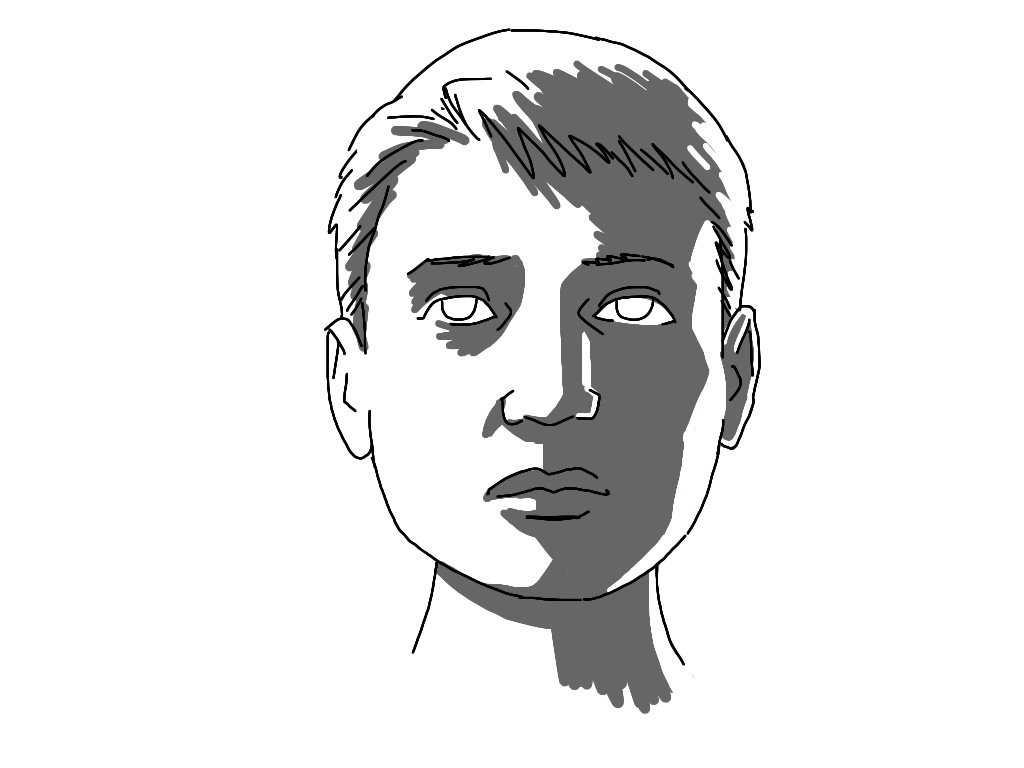 5: Double-lit
Almost the same as above, only with a second light source, to make the face seem three-dimensional and add to the atmosphere.
Effect: Makes it look like you are the best artist in the world! Seriously!
Pitfalls: It's tricky to tackle both light sources at once, so draw the primary shadow first and then apply the secondary light source in highlights after the fact. Here I added a little more dark to widen the distance between the light sources. It's also a good idea to make one highlight sharp and the lines on the other more fuzzy.
Homework assignment: Print out a bunch of copies of the shadowless, bland face and test your newly achieved skills!
—
Hey, if you liked these tips, you're gonna LOVE our newsletter. Sign up now and get more tutorials and bonus content!
How To Draw Shadow On Face
Source: https://comicsforbeginners.com/art-tutorial-light-shadow-face/
Posted by: schofieldnamon1996.blogspot.com
0 Response to "How To Draw Shadow On Face"
Post a Comment